
Note: In the interest of safety, please make sure your appliance is unplugged from the mains and that the area you are working in is safe.
Removal process
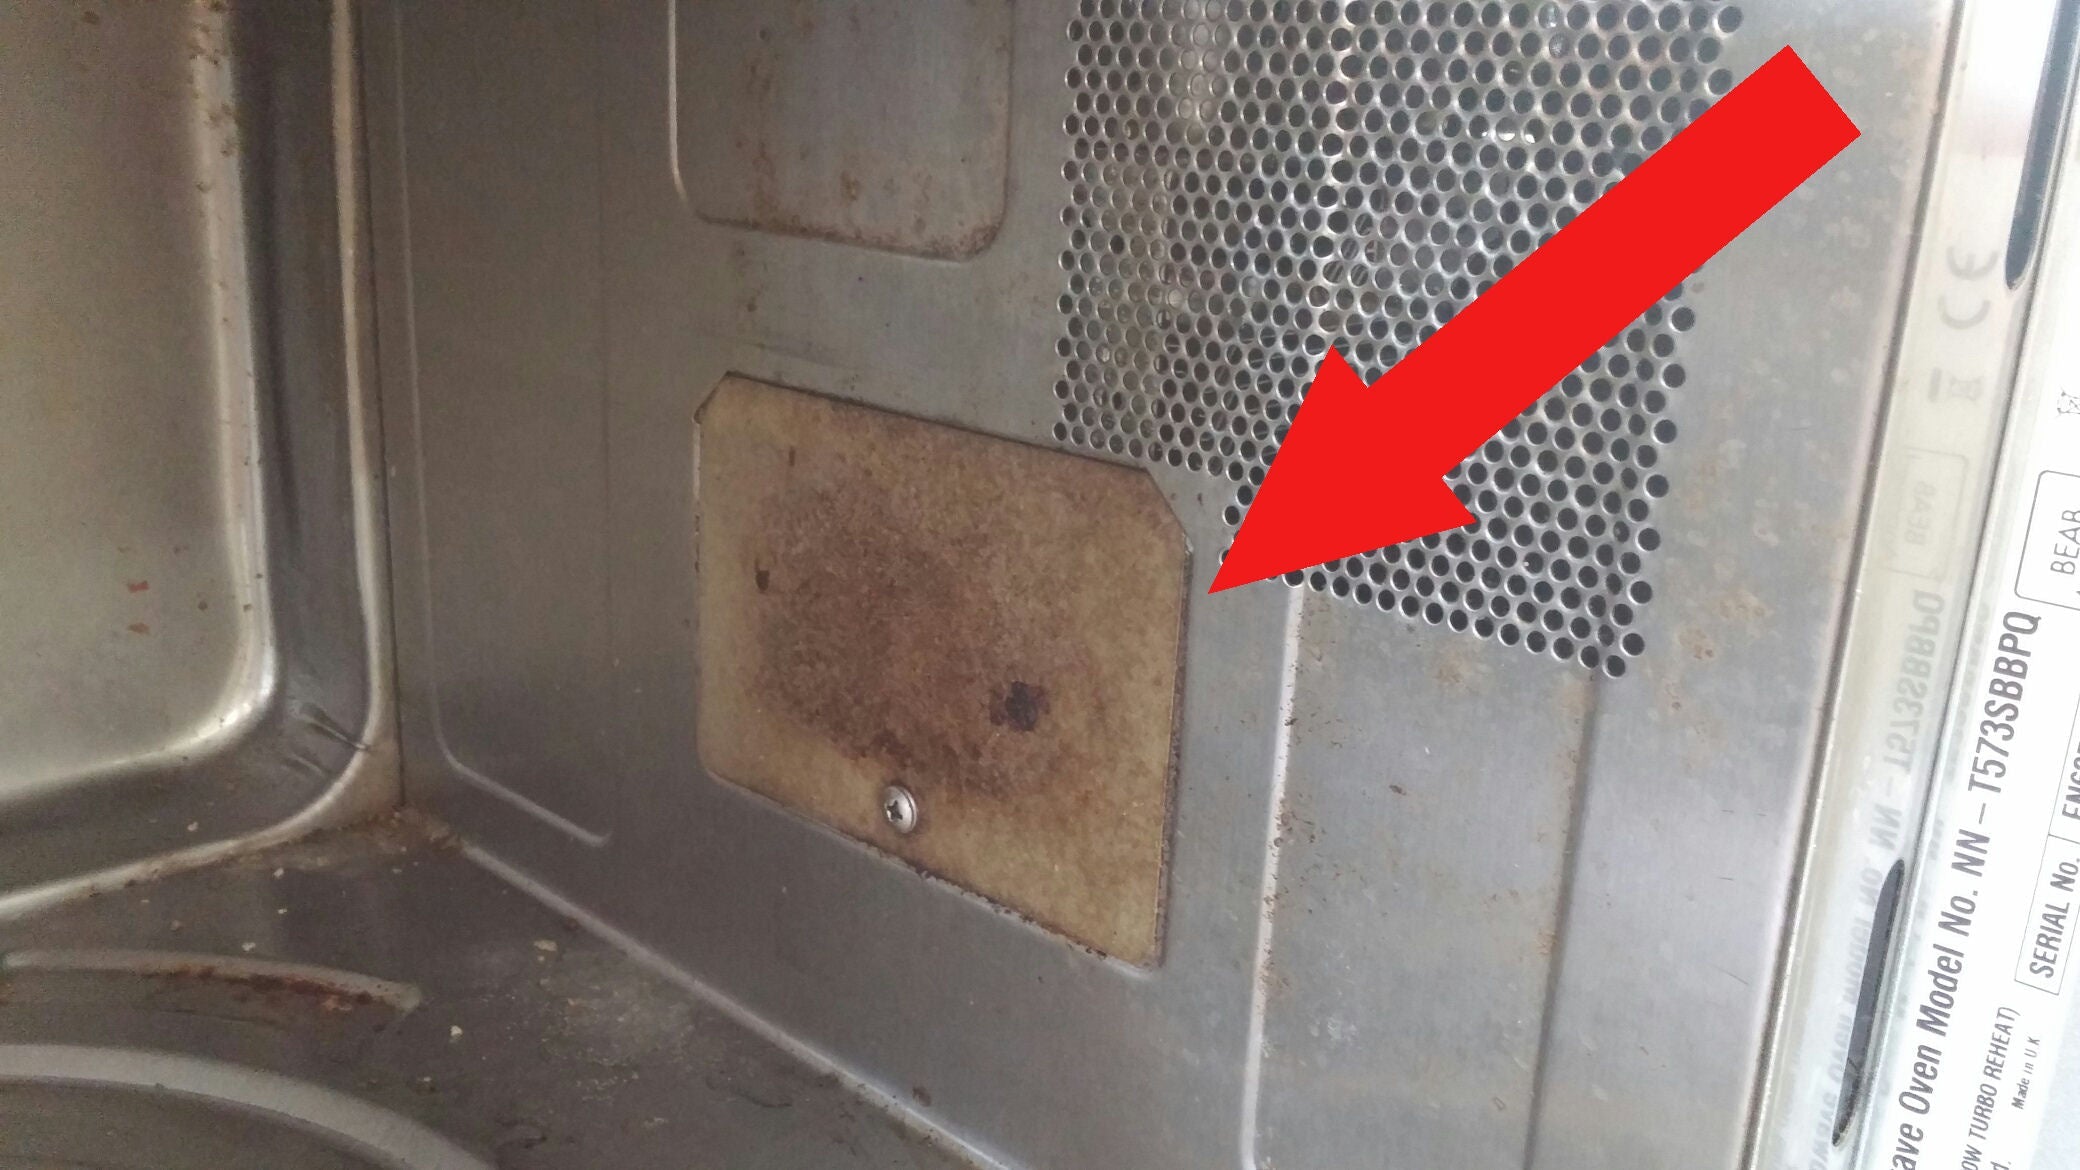
Changing the Waveguide cover is an easy process.
· Firstly, start off by removing the screws that hold the cover on.
(Some models may have a plastic rivet holding it in place, simply prise the rivet out)
· Then, once you have removed the screws/rivets you can bend the sides of the cover in and pull off the original cover.
(You may notice the cover is greasy, dirty and maybe slightly burnt. The reason Waveguide covers get like this is they absorb fat splashes and general grease in the microwave)
· Thirdly, clean up the area behind the Waveguide cover using a good microwave cleaner to ensure the surface is near spotless


Fitting your new Waveguide cover
· Line up your new cover in the Microwave, ensuring the screw/rivet holes line up.
(If using rivets, place the bottom half of the rivet in before the Waveguide cover)
· Fit the screws back into the new cover and tighten
(Push the top half of the rivet back into the Waveguide cover holes)
Stand back and admire your work!
Please ensure you keep the Waveguide cover clean after each use
The correct Waveguide covers can be found on our website: